...
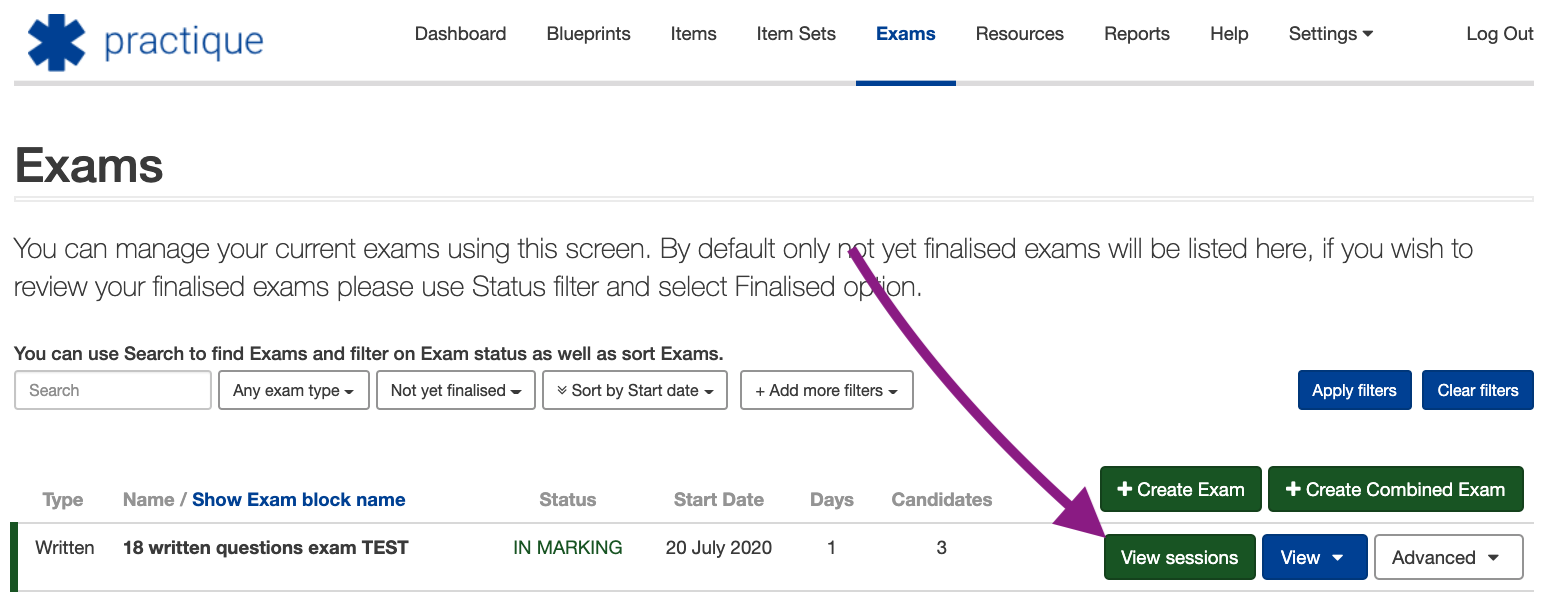
From the ‘Exams’ tab click ‘View sessions’ on an exam that is in the ‘IN MARKING' state
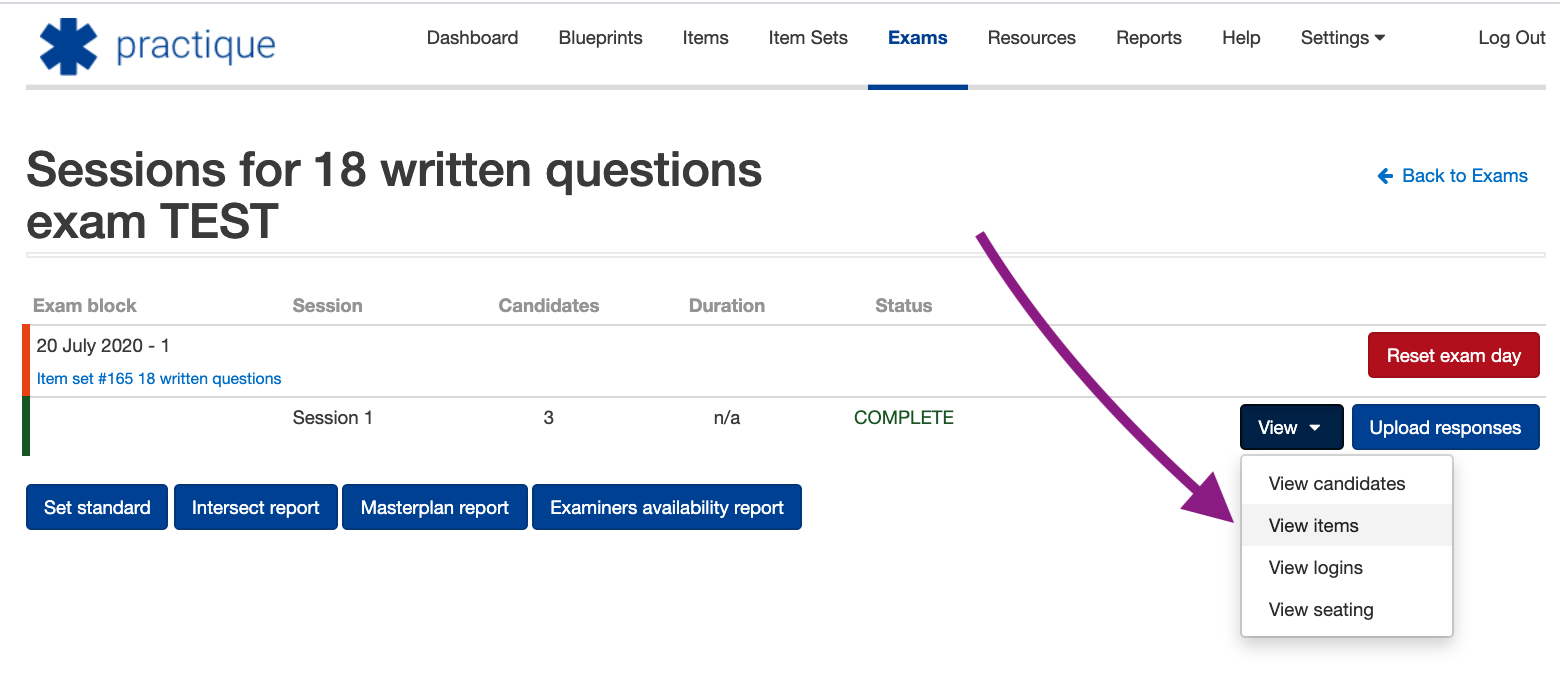
From the ‘Session’ screen, select the ‘View’ dropdown and from the options, select ‘View items’
From the ‘View items’ page, select ‘View’ next to an item, so that you are able to go and change some marks.

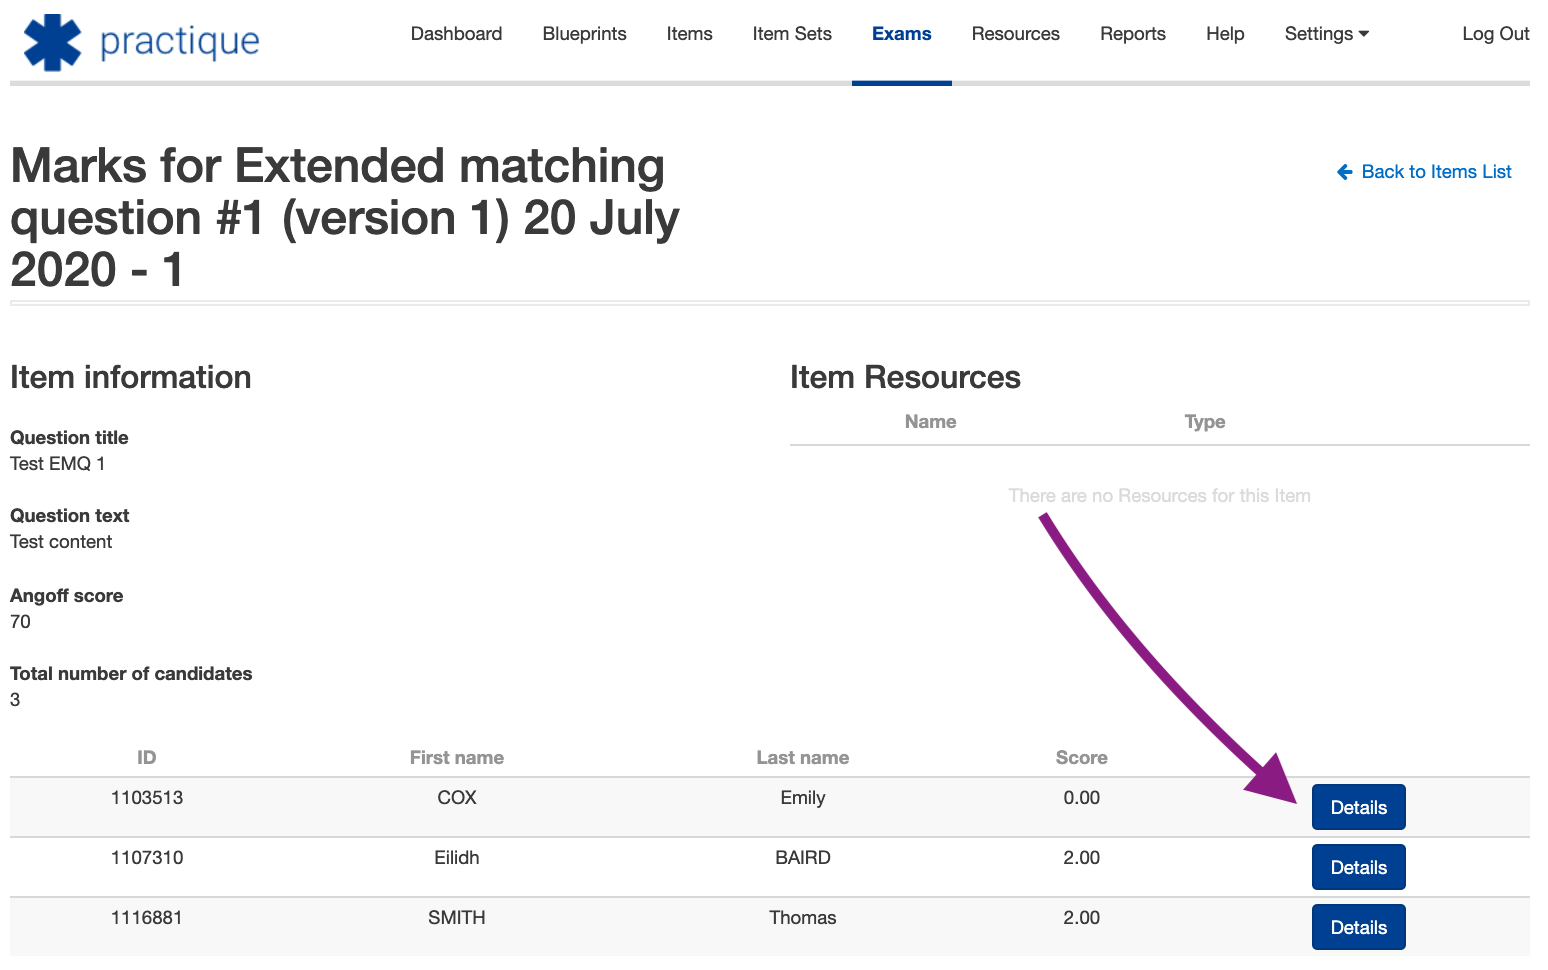
From the ‘Item' page, select the ‘Details’ button to be taken to the candidate's marks, so that you can change them.
On the marks detail page, change the mark that the candidate has already been given. Note: before saving the changes, the system will force you to provide a reason for making the changes.
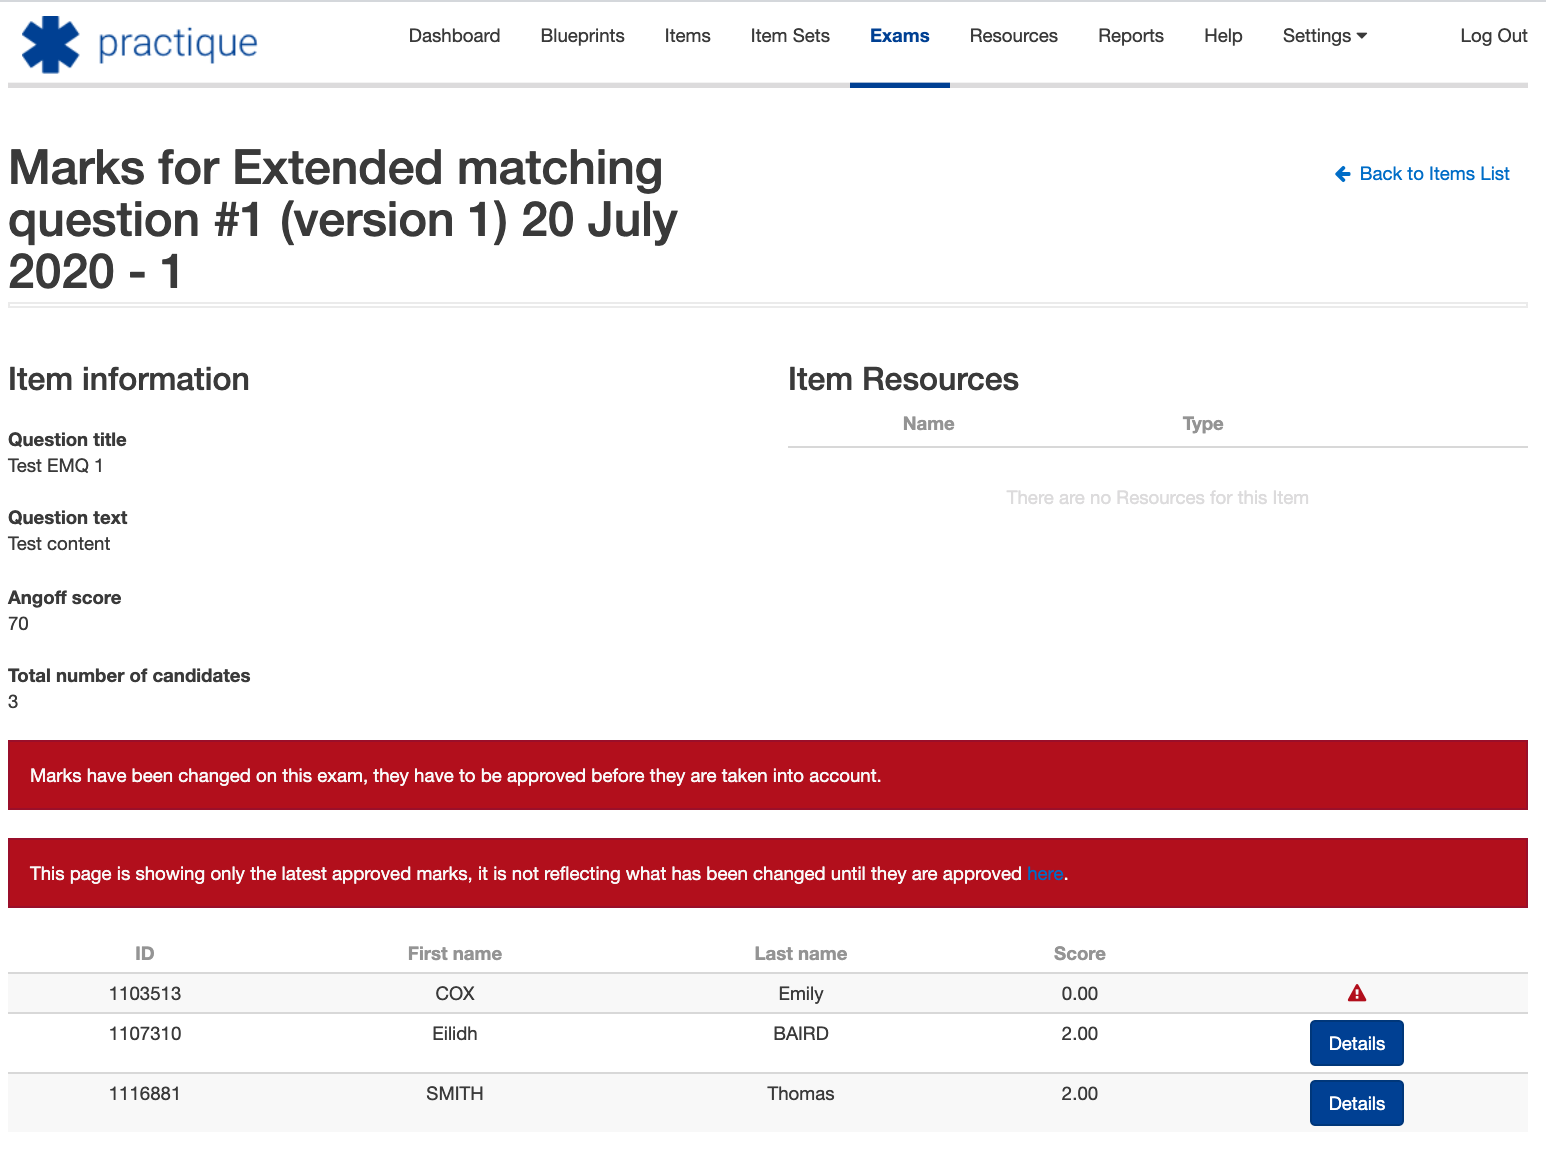
Once you have saved the changes, you will see the page reload with three warnings:
‘Marks have been changed on this exam, they have to be approved before they are taken into account.’
'This page is showing only the latest approved marks, it is not reflecting what has been changed until they are approved here.'
A warning sign in place of the details button for the candidate whose marks have been changed.
You can now access the report of mark changes in three different ways (providing you have the permission to approve changed marks):
Directly from the screen above using the link in the second red warning message ‘here.'
If you go to the exams dashboard, you will see a warning next to any exams that have had mark amendments made to them.
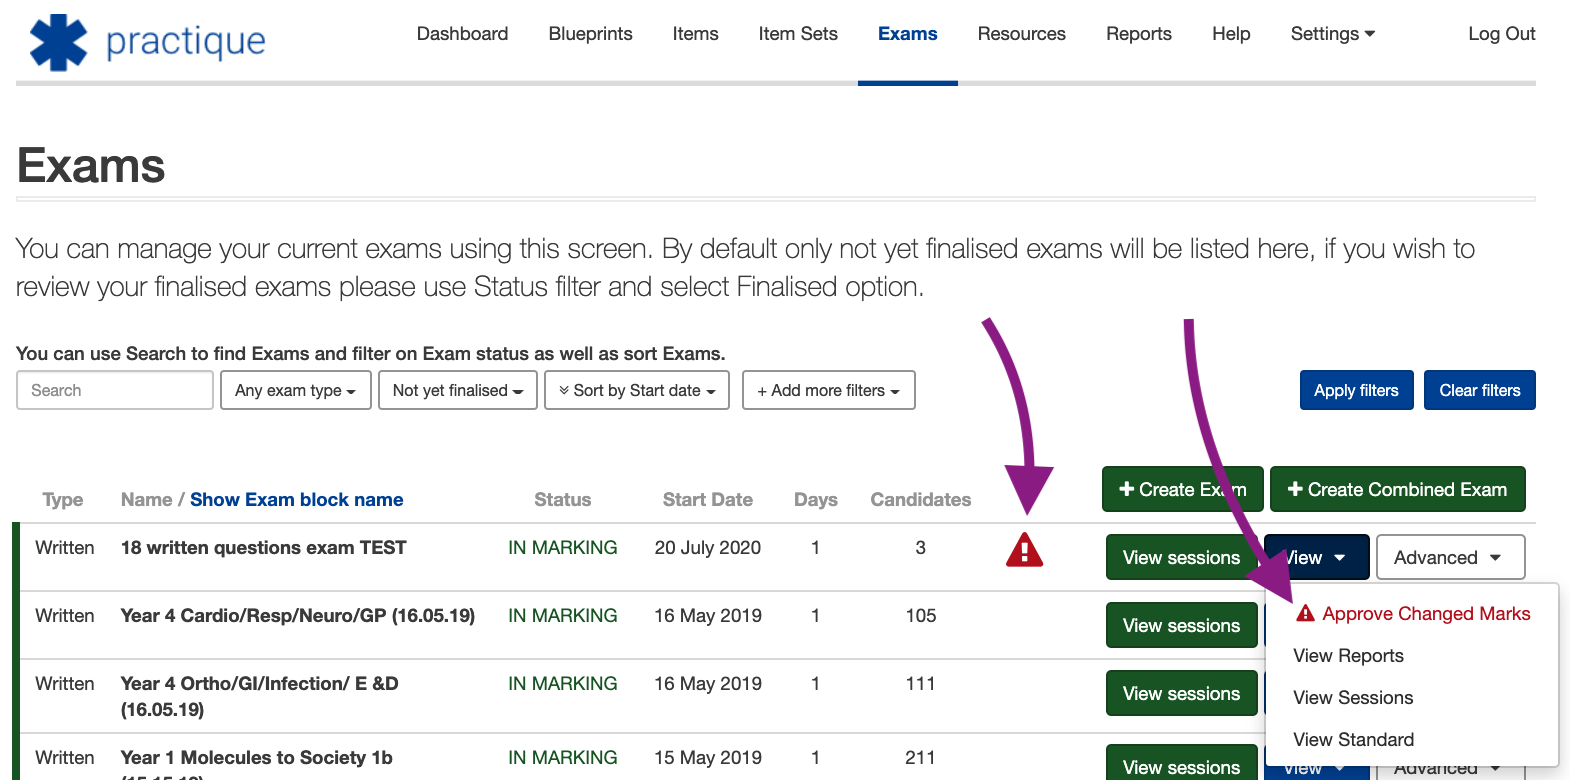
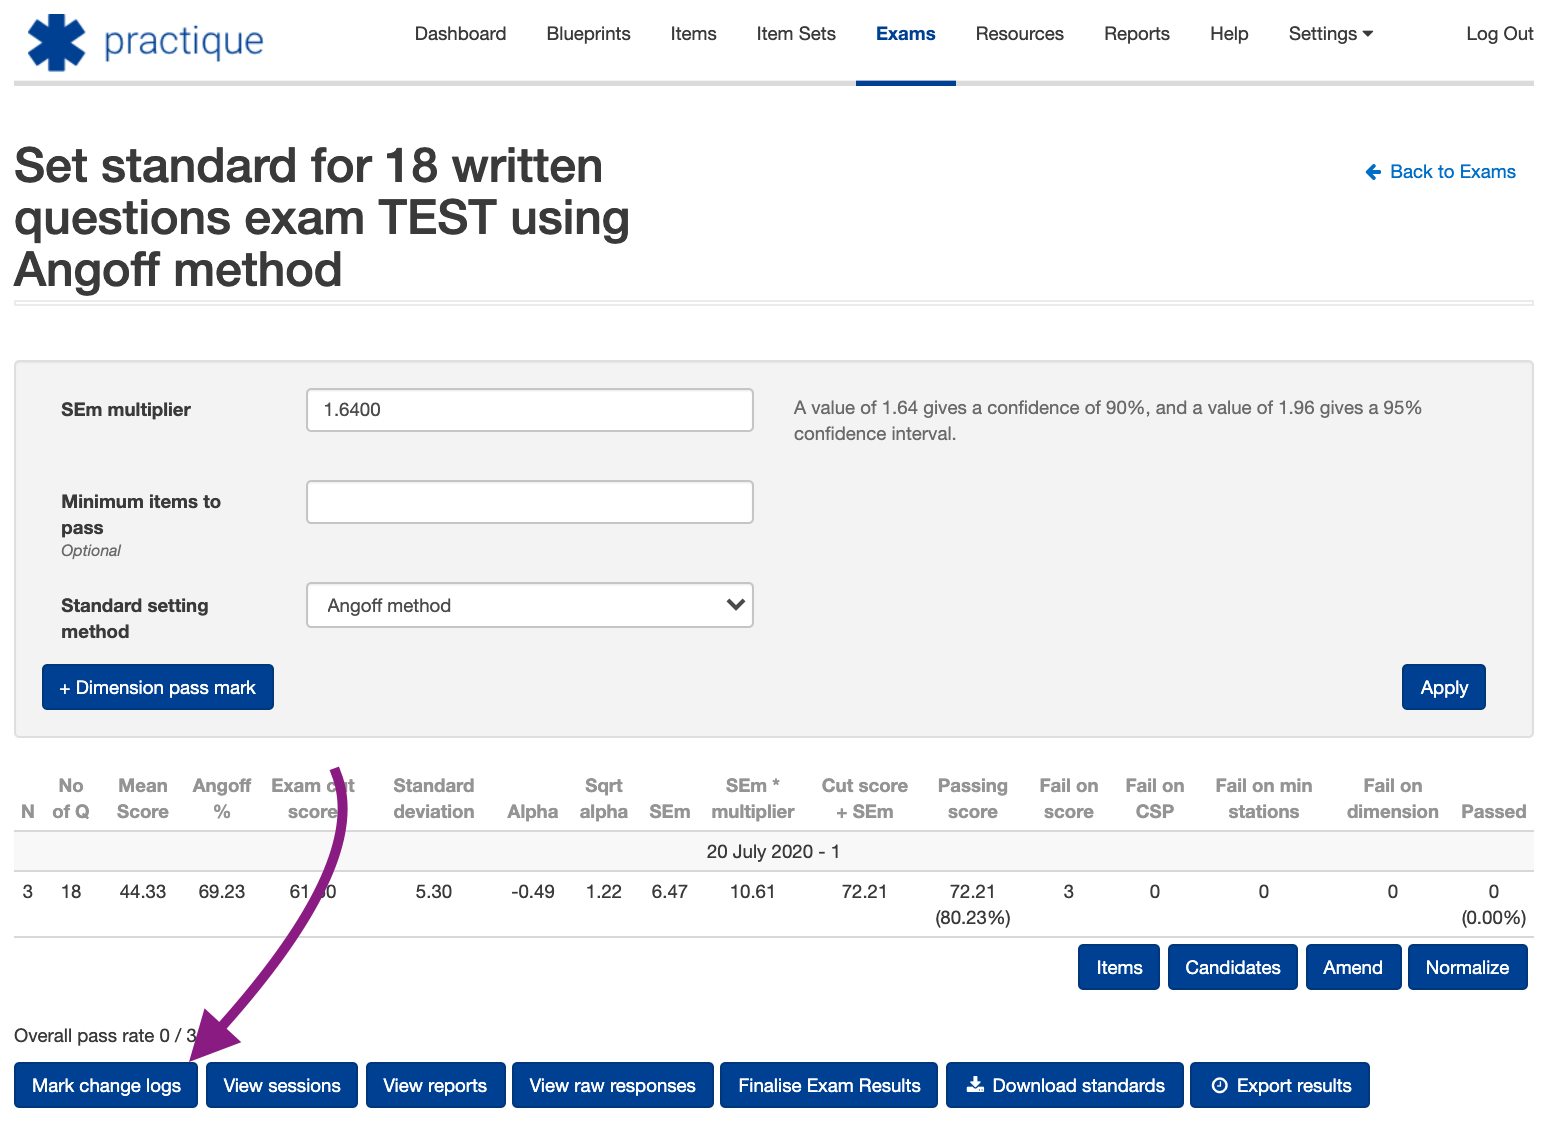
From the ‘Set standard’ screen. If you access the ‘Set standard’ screen, if marks have been changed, you will see a button appear ‘Approve Changed Marks’
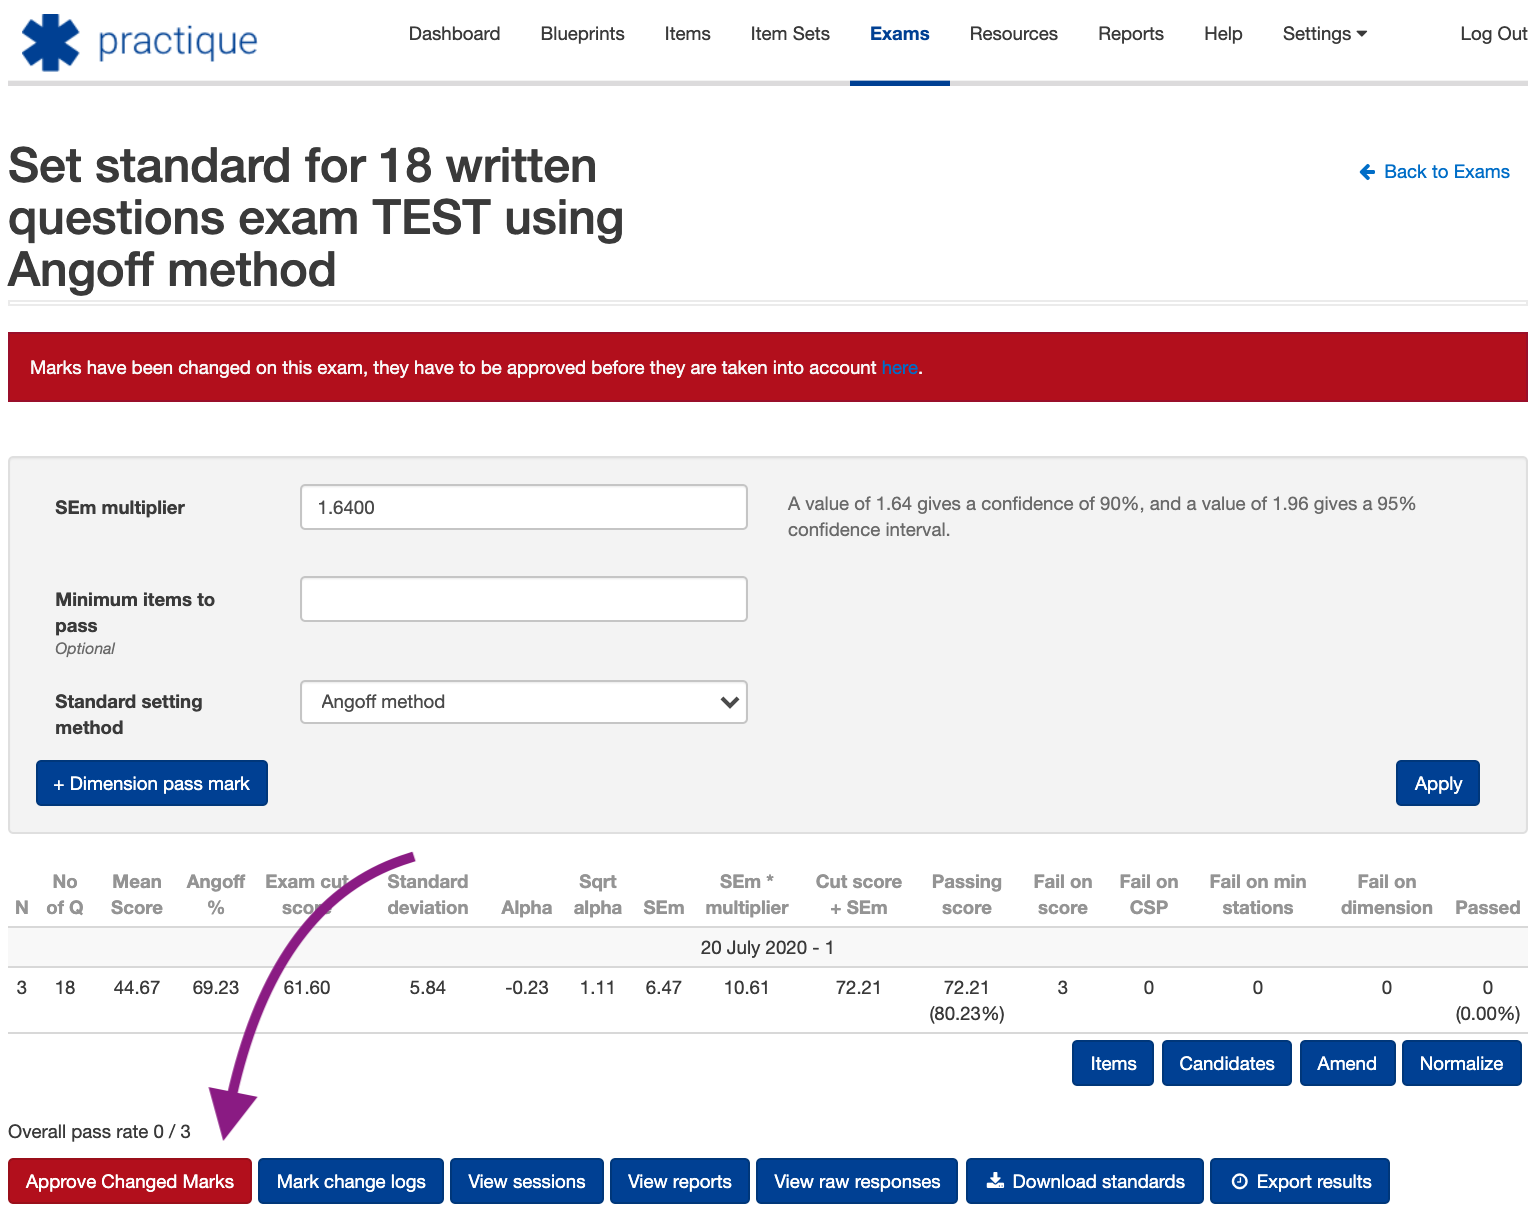
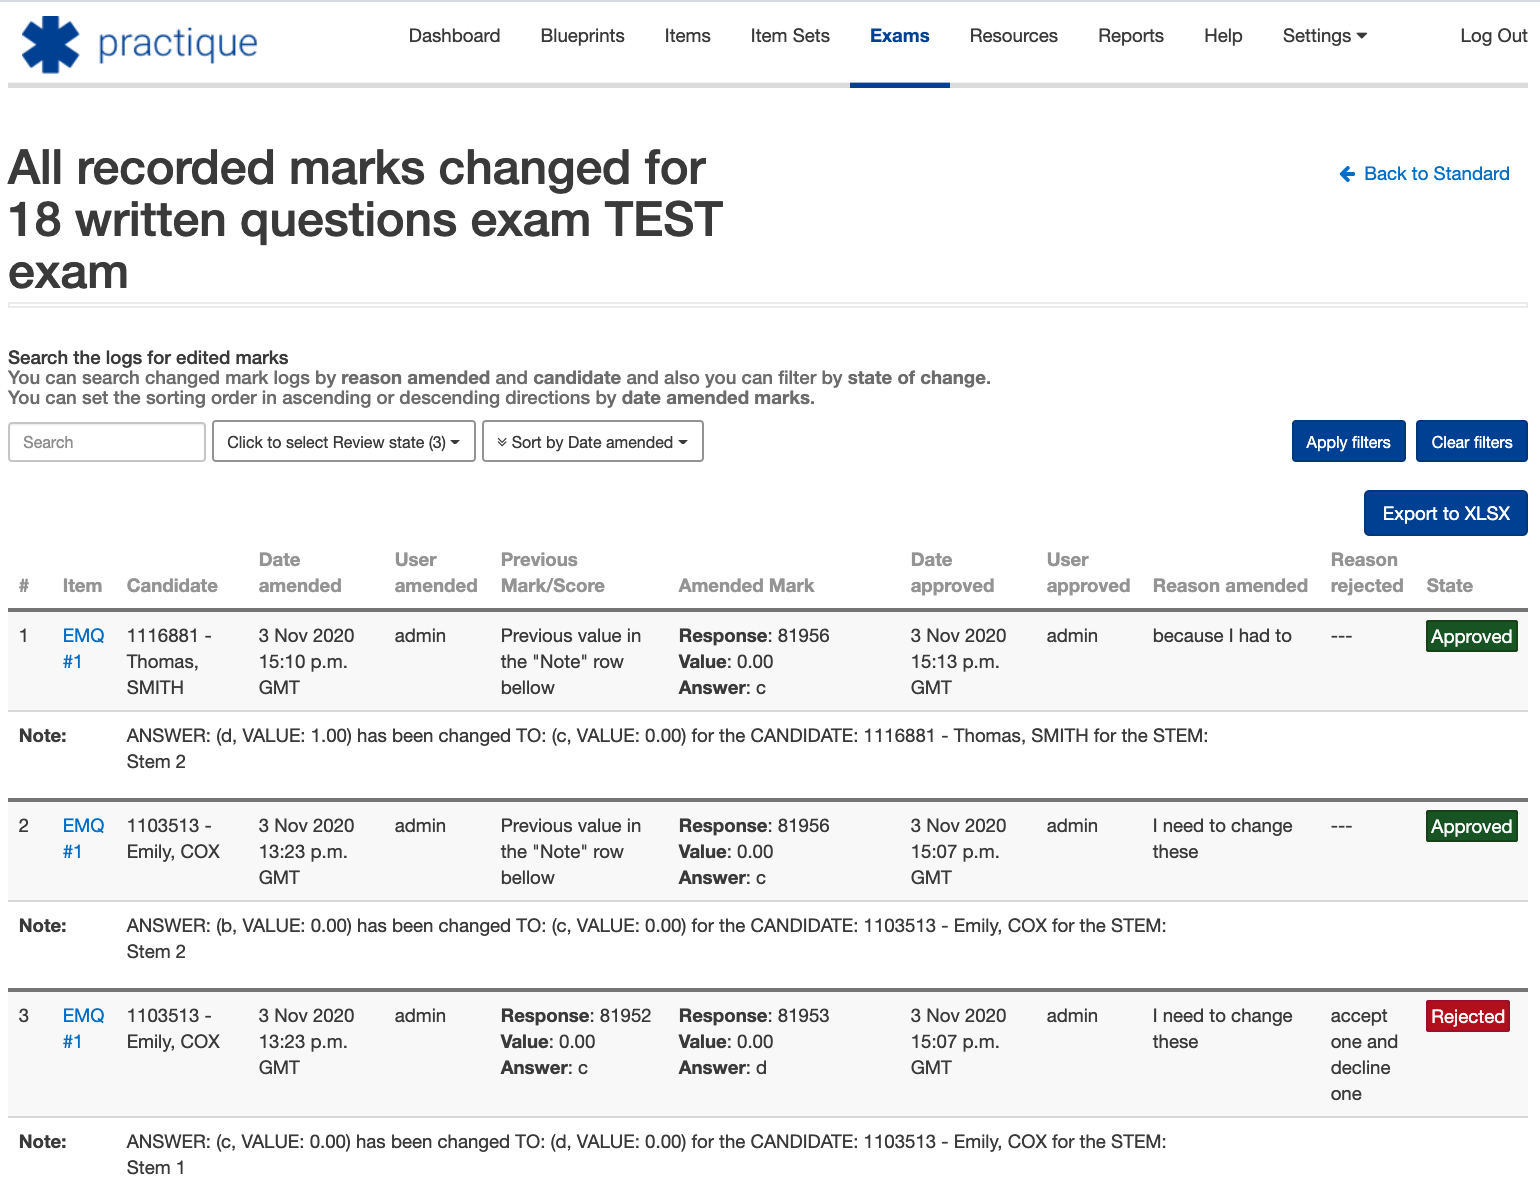
Once you have accessed the mark approval screen, you will see this view:
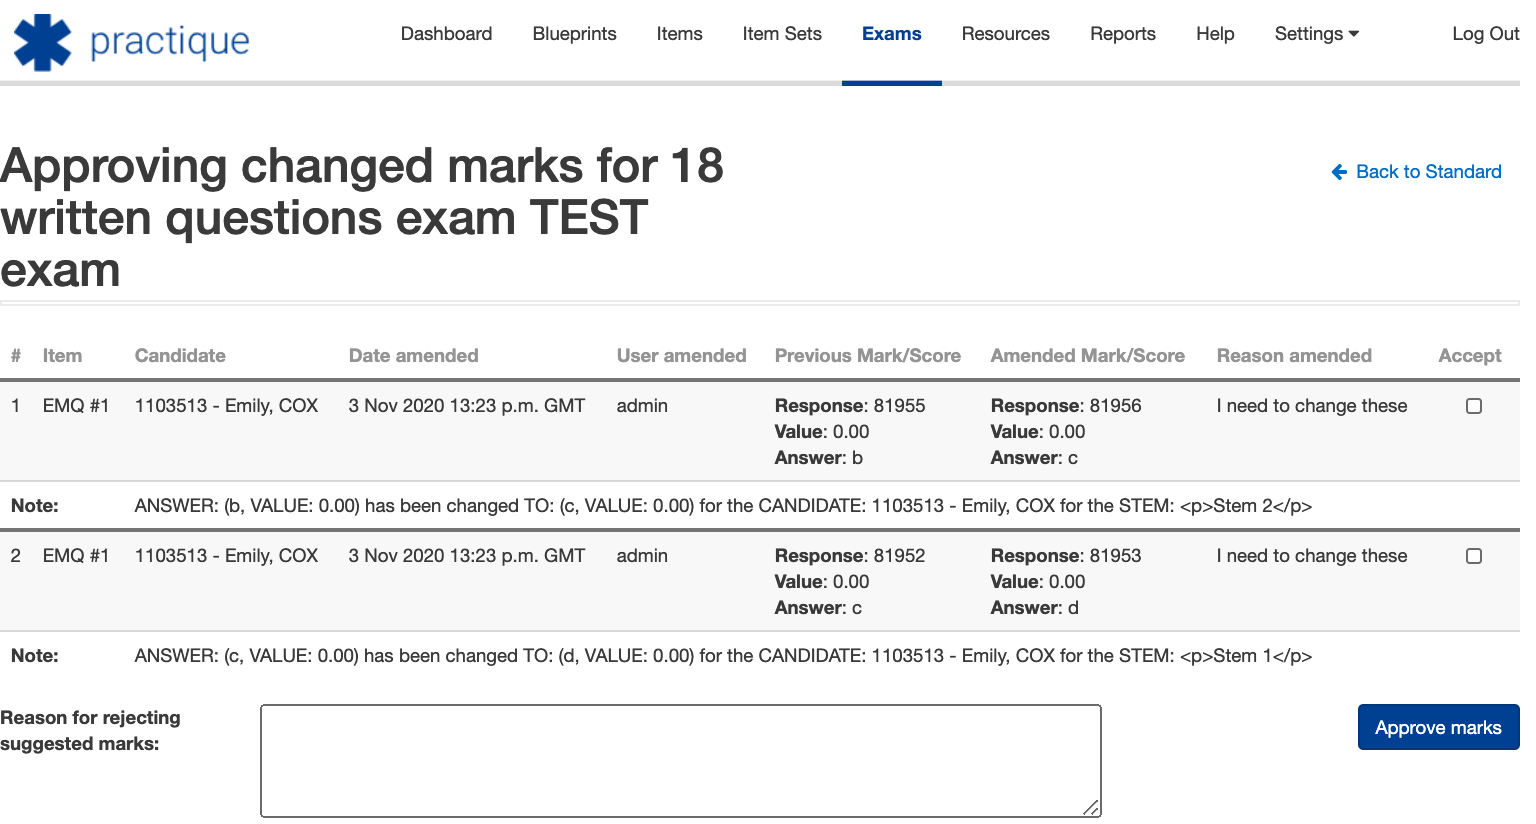
You now need to accept or reject the mark changes. The table shows all of the information about this change that has been made, including a description of what the answer was changed from and then to.
To accept a changed mark, select the checkbox ‘Accept’ in the last column. If you accept the changes, you will not need to provide a reason in the text field. This is only used if you are rejecting the mark changes that have been made.
Once you have accepted and or rejected the mark changes, you will be taken back to the ‘Standard setting’ screen in Practique, as you will need to update the results if there have been changes.
You are always able to access the ‘Mark channel logs’ from the ‘Set standard’ screen
From the ‘Mark change logs’ screen, you can see the following information:
Search field to search fror for changes
Filter for review state of changes
Sort order picker
Export to XLSX
All mark changes with their audit log