You will require this information if you are looking to create an event, or edit one.
Step-by-step guide for managing the events section landing page.
- Navigate to the events section landing page (ensure that you are logged in, and have the relevant permissions to be able to edit the section).
- Click the 'Edit' button oa tthe top of the page, and once you are taken to the edit form, navigate to the 'View' tab.
- On the 'View' tab, you will see five fields:
- 'Events path'
- Select the path that the events section is looking in. By default events are taken from current section only. Enter '/' for site wide searching.
- 'Select visible event categories'
- This selection box field allows you to define which events are listed on the landing page, by the category that they are tagged by. If all of the categories are in the left box, all of the events tagged by any category will be shown. If you would like to restrict the events showing by category, then highlight and move, using the arrows, only the categories that you would like to see, to the right box.
- 'Select visible event types'
- This selection box field allows you to define which events are listed on the landing page, by the type that they are tagged by. If all of the types are in the left box, all of the events tagged by any type will be shown. If you would like to restrict the events showing by type, then highlight and move, using the arrows, only the types that you would like to see, to the right box.
- 'Select visible listing filters'
- This field allows you to define which of the filters you would like to display on the page, for your users to be able to filter the events in the section by. If all of the filters are showing in the left box, all of the filter options will be displayed to a user. If you would like to select a specific set of filters to show your users, then use the arrows to highlight and move the filters that you want to show, into the right box.
- 'Always show listing filters if available'
- This is a checkbox field. The default for the events listing page, is to have the filters hidden, and provide the user with a button to show or hide the filters. If you would like to change this logic, so that the filters always show at the top of the events page by default, then check this box.
- Clcik the save button, if you have made any changes.
Step-by-step guide for adding tabs to events.
- Navigate to the event that you would like to add more content to (ensure that you are logged in).
- Once you are in the individual event, use the 'Add new' menu to add a 'Webpage' to the event.
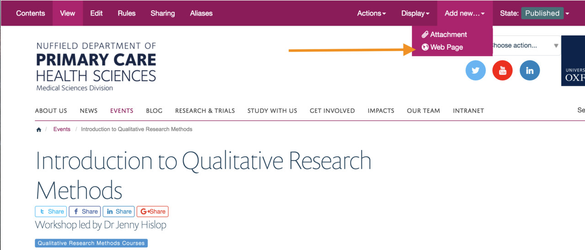
- You will be taken to the edit interface of the webpage, and simply create this page as you normally would. NOTE: You can use the 'Image' field as well, as this can be shown in the tabbed content.
- Save the page that you have created, and you will be taken to a 'View' page of it.
- Navigate back to the original event, using the breadcrumbs on your website, or the regular navigation.
- Click 'Edit' on the event that you have just added the extra webpage to.
- You will see a new tab 'Additional content' select this tab.
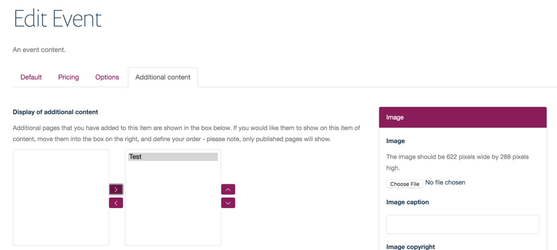
- On the 'Additional content' tab, you will see 2 fields:
- 'Display of additional content' this field comprises of 2 boxes.
- The box on the left, will show the additional pages that you have added to the event and are then available for use as tabs.
- The box on the right, is where you move the pages to, if you want them to show as tabs under the main content of the event.
- So, to show an additional webpage on a tab, move it from the left box to the right. Please note, the page will only display publicly if it is published.
- 'Additional content fields'
- This field has a left and a right box.
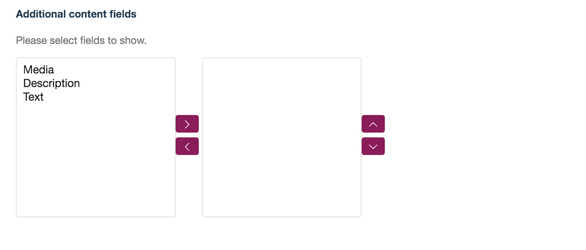
- These boxes allow you to define which fields of the additional items of content will show on the tabs. NOTE: This defines the configuration for all the tabs, you cannot choose to display some information on some tabs and not on others.
- To chose which fields you would like to show, move them from the left box to the right box. The items in the right box are the ones that will show on the page. You can also use the arrows on the right to change the order that these fields display in.
- Once you have defined all of the above, save the settings, and you will then see the tabs on your webpage.
Related articles
| Filter by label (Content by label) |
|---|
| showLabels | false |
|---|
| max | 5 |
|---|
| spaces | HKB |
|---|
| showSpace | false |
|---|
| sort | modified |
|---|
| reverse | true |
|---|
| type | page |
|---|
| cql | label = "kb-how-to-article" and type = "page" and space = "HKB" |
|---|
| labels | kb-how-to-article |
|---|
|