Basic Written Exam Setup (Single Best Answer)
This guide will help take you through the very basics of how to a set up a simple written exam in Practique. This covers only the barest minimum tasks to set up an exam. It covers how to do things, but not why. For best practice, there are many additional things you may want to look into, such as dimensions or constraints, which are ways to categorise exams and questions. The guide will take you through the following steps:
Step One - Login
Log into Practique using your login details. You will have received these when your administrator created you as a user. You can find out how to reset your password if you have forgotten it here
Once logged in you can navigate through Practique with the following tabs:
- Dashboard: where your current exams will be visible
- Blueprints: the framework of the exam and any tagging framework you create
- Items: Where your questions or stations are kept
- Item Sets: Where the "Exam papers" or collections of stations that make up a particular exam are kept
- Exams: where you create the exams; details including date, time, standard setting to be used etc.
- Resources: where you upload documents used for each station e.g. Examiner info pack, actor briefing notes, student briefing. It can include documents, images, videos etc.
- Reports: where you find reports on completed exams. Note: not covered in this basic tutorial
- Help: access to Knowledge Base to get further help, Services Desk to report problems or bugs, Practique HQ for updates about Practique Note: not covered in this basic tutorial
- Settings: access to user management, candidates & examiners management, device management and all global settings.
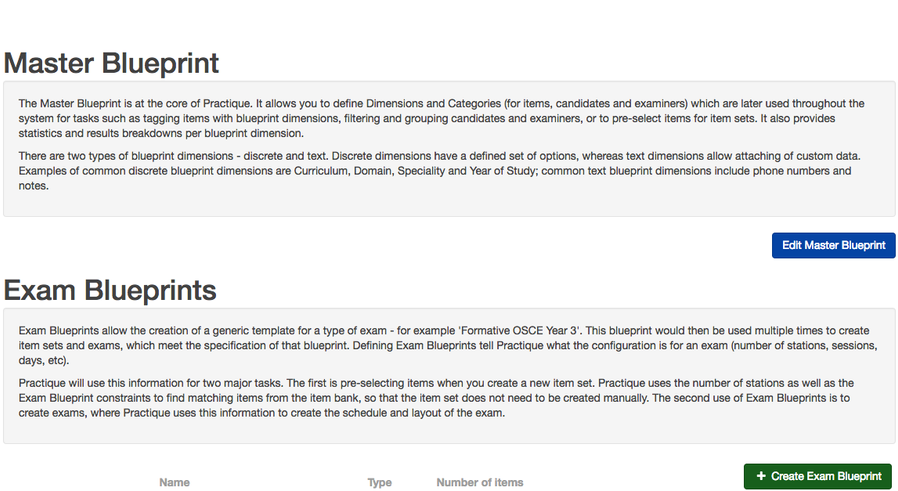
Step Two - Set up your Exam Blueprint
This is how you can define the information about the structure of the exam.
- Click on the Blueprints tab.
You are presented with this screen:
In order to run an exam in Practique you do not need a Master Blueprint but you will always need to set your Exam Blueprint. - Click on Create Exam Blueprint.
The next screen you see is the create exam blueprint page.
Give the exam a name. (Remember it, you’ll need it later!)
For exam type, select WRITEX.
Exam size is the number of different questions or stations you need. For now, enter 2.
Click on Create Blueprint and you are ready to create an exam (You will need some questions of course)
You can edit constraints for your exam, but this is not necessary for a simple exam setup. Constraints are limitations on the structure of the exam. This would be needed if you wanted to allow the questions to be automatically selected from a bank of questions. We won’t look at these for now.
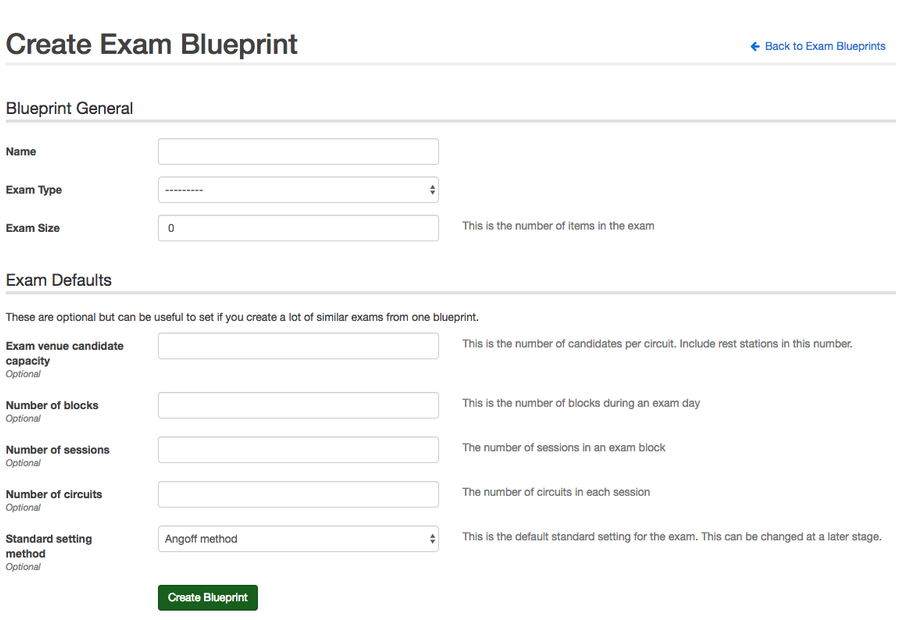
The remaining 4 questions are optional. For now, we will leave them blank. But explanations have been provided below.
- Exam venue candidate capacity: This is the number of candidates per session.
- Number of blocks: the number of sets of questions used in a day. If 1 set of questions is being used all day it would be 1 block. If 2 sets of questions are being used it would be 2 blocks.
- Number of sessions: the number of times the exam repeats itself in a day.
- Number of circuits: the number of simultaneous exams (rotations) running.
- Standard setting method: the default standard setting for the exam. If you select one at this stage, it can be changed at a later stage.
Step Three - Create your Questions (Items)
This is how you create questions.
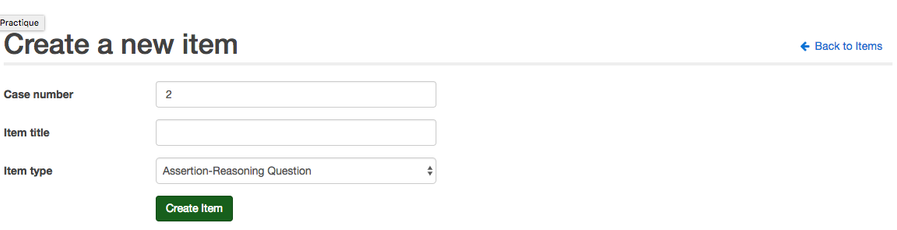
- Click on the Items tab.
- Click on Create new Item.
The next screen creates the outline of the item. - The Case number is automatically generated - This is the number Practique uses to identify all questions in the question bank. It will not appear on any question paper.
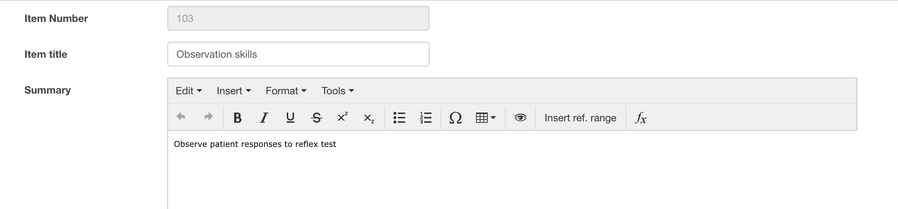
- In Item Title enter the name of your question.
- For Item Type choose your question type, eg: SBA, Multiple True/False.
- Click on Create Item.
The next screen lets you enter the text of the question stem in the "Summary" box. The remaining fields can remain blank for now.
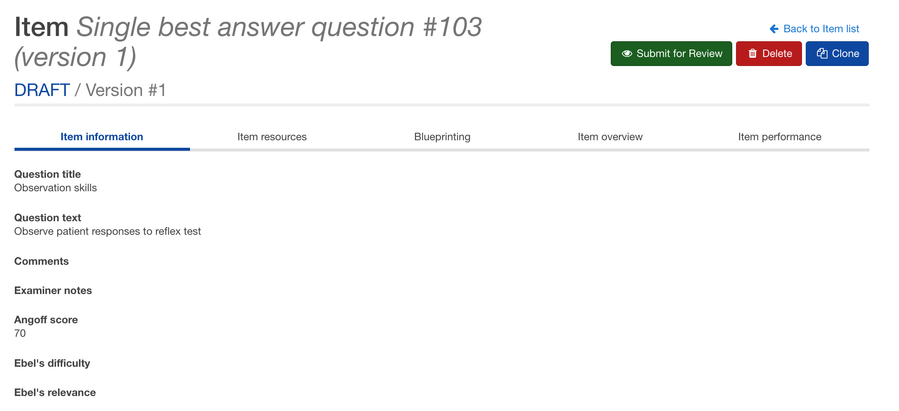
- Item Information: The information you just entered and versioning
- Item resources: Add images, examiner info documents, actor briefings, student briefings, videos etc. to a station
- Blueprinting: Add ‘dimensions’ for automatic generation of exams
- Item overview: Summary of the question
- Item Performance: Shows reports of how the question has performed in previous exams
To approve your item
Click Submit (Green button).
Click Approve (Green button).
Once approved an Item can be used in a question paper (Item set)
Step Four - Create your Question Paper (Item Set)
Item Sets
In the item sets tab, you will be able to combine questions into an exam.
Click on the Item Sets tab
Click on Create a new Item Set.
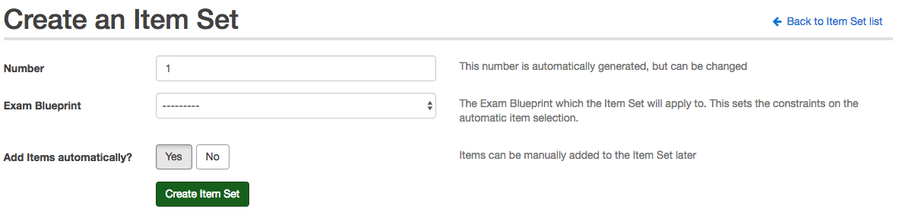
You are now presented with the ‘Create an item set’ screen.
- In ‘Exam Blueprint’ select the name you gave to your OSCE at the beginning
- In ‘Add Items Automatically’ choose No
- Click Create Item Set.

In the item set page, you can now add questions to your question paper (Item Set)
Click Add an Item and you will be taken to the item bank where you can search and add the items you want
you can always navigate back to the item set you are working on and see the items you have added. you can change the order by drag and drop or replace items


The item set is now complete, as it only requires two questions, as we set in the earlier blueprint.
Now we need to submit and approve the Item set in order to use it in an exam.
- Click Submit for Review
- Leave the boxes blank and click Submit
- Click Approve (Green button).
- Click Approve (Blue button).

Step Five - Create your Exam
In the Exams tab screen, you will set up the detailed exam information such as rotations, examiners and students.
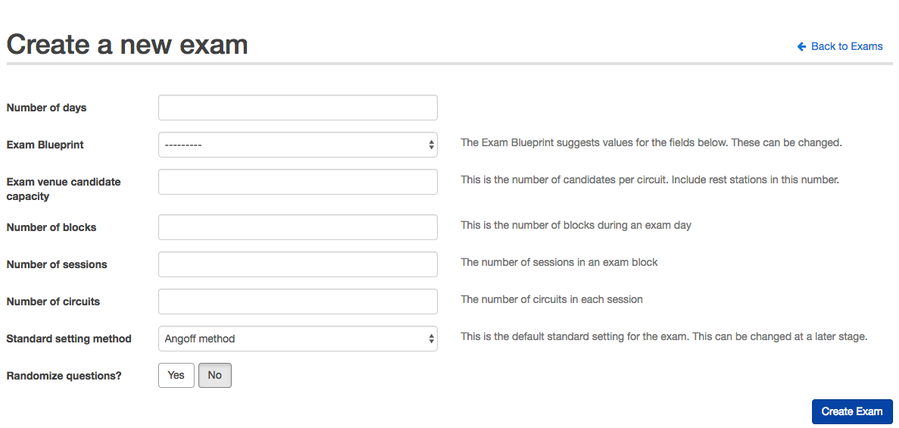
Click Create Exam.
- In ‘Number of Days’ enter 1 (if you had 3 days of exams you would enter 3 here)
- In ‘Exam Blueprint’ select the exam you made earlier.
- In ‘Exam Venue Capacity’ enter (this is the number of students taking the exam)
- In ‘Number of Blocks’ enter 1 –If you use a different set of questions in the AM and PM you would enter 2
- In ‘Number of Sessions’ enter 1 – This is the number of sessions that happen in each block or day. For example, if there are three sessions before lunch and three after and you are using the same the questions all day (1 block) you would enter 6. If you had 2 blocks (different set of questions in the morning and afternoon, you would enter 3.
- In ‘Number of Circuits’ enter 1 – this is the number of simultaneous exams (rotations) running, for example, if using two rooms of 10 stations each, with each candidate taking 10 stations you would enter 2.
- Leave ‘Standard Setting Method’ as Angoff and ‘Randomize Questions’ as No
- Finish by Clicking Create Exam.
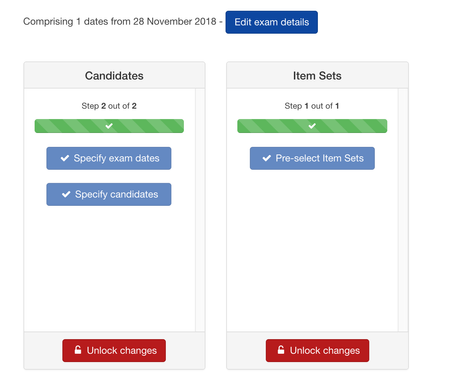
Now the exam has been created you will be taken to a screen that shows an overview of the elements of the exam that needs to be completed. This is split into Candidates, Item Sets.
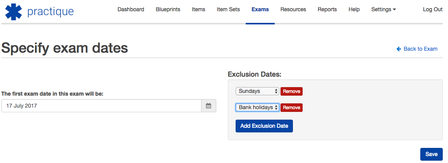
Under ‘Candidates’ click Specify exam dates.
In ‘The first date in this exam will be’ select today’s date.
For now, ignore Exclusion Dates.
Click Save.
Then Click Pre select Item Sets to choose your question paper (Item set) that you have previously prepared.
Then Specify your candidates using the upload template when you press the specify candidates button
Step Six - Publish your exam and deliver it (online or on paper)
Starting Exams
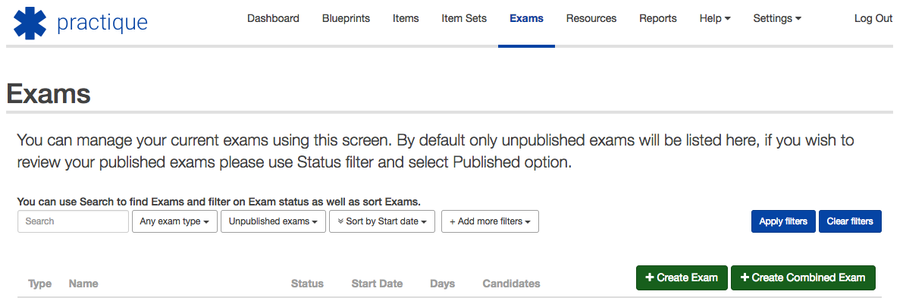
Click the Exams tab.
Find your exam, and click on View.
Click on ‘View Sessions’
Click Publish to devices.
The exam will be loaded on to devices. This should be done the night before at the latest. When you are ready, start the session:
Click on the ‘Dashboard’ tab
Find your exam and click Start session


