You will require this information when you would like to use the 'Selected items portlet'
Instructions
- Navigate to the content that you would like to add the content to (ensure that you are logged in with the appropriate permissions).
- Click on your name in the top right of the edit bar to access the drop-down menu

- Select 'Manage portlets' from the drop-down menu
- Use the 'Add portlet' drop-down menu to select 'Selected items'. Use the Primary or secondary portlet, depending on the content type that you are adding the portlet too, and the display of the content.
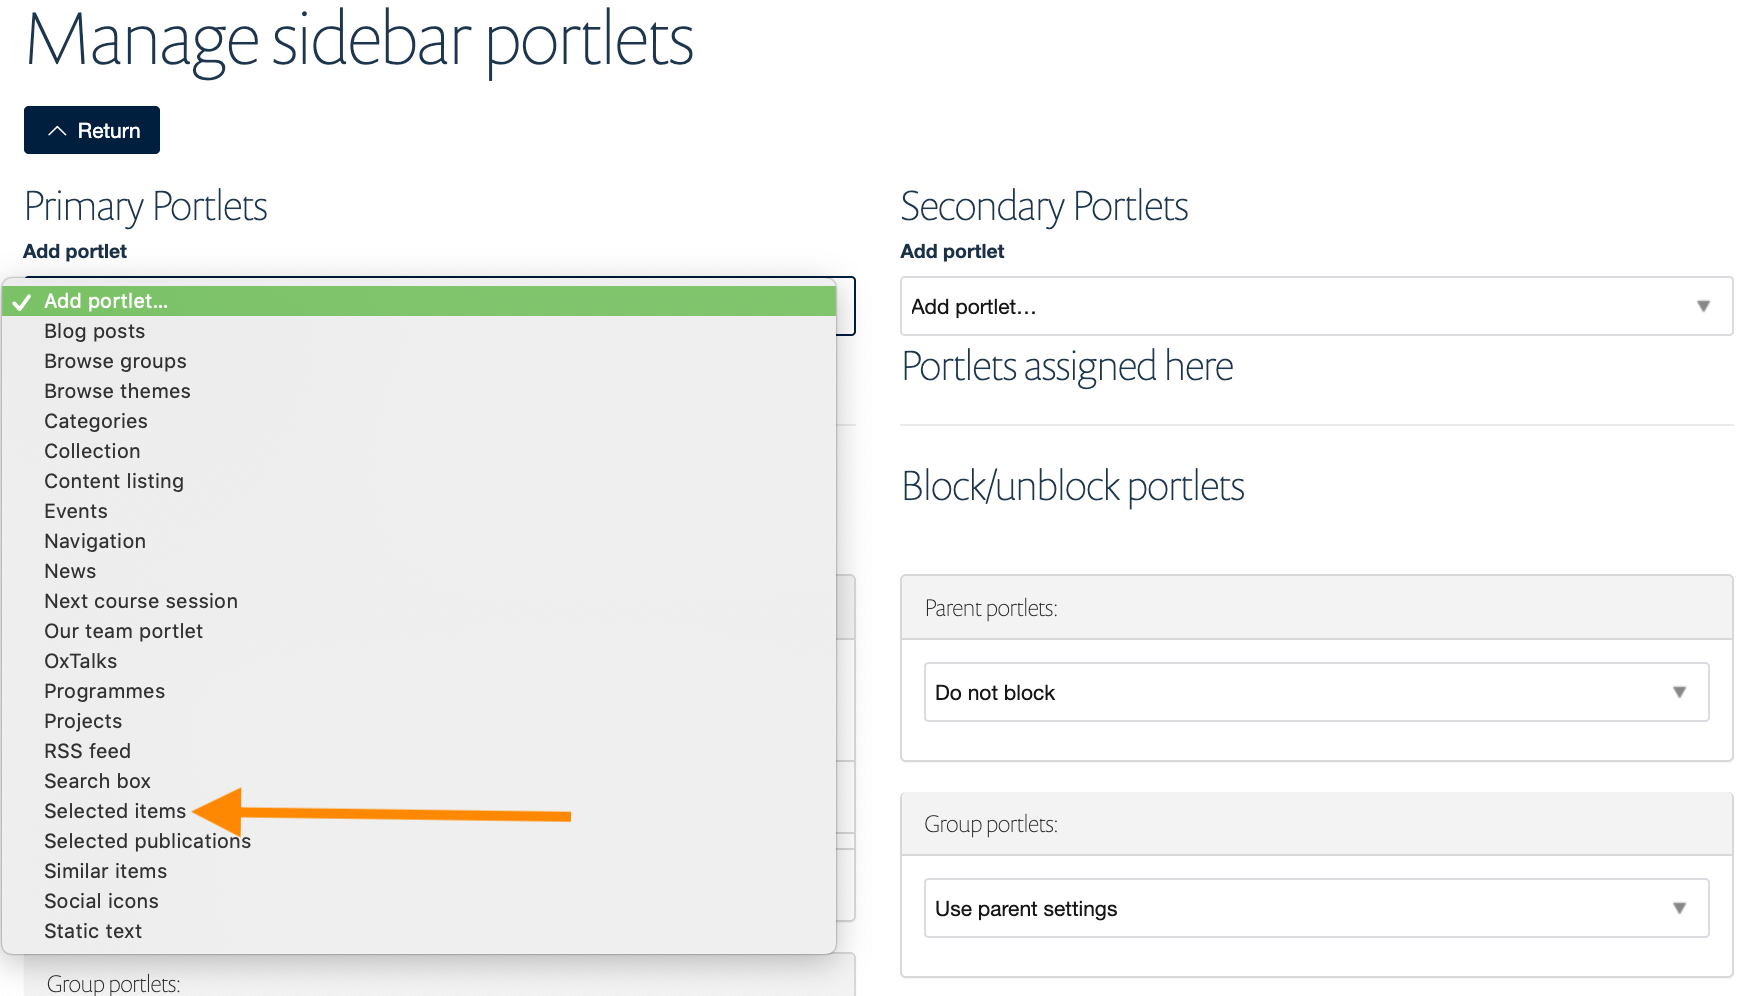
- Once you have selected the portlet, you will be taken to the edit form with the following fields:
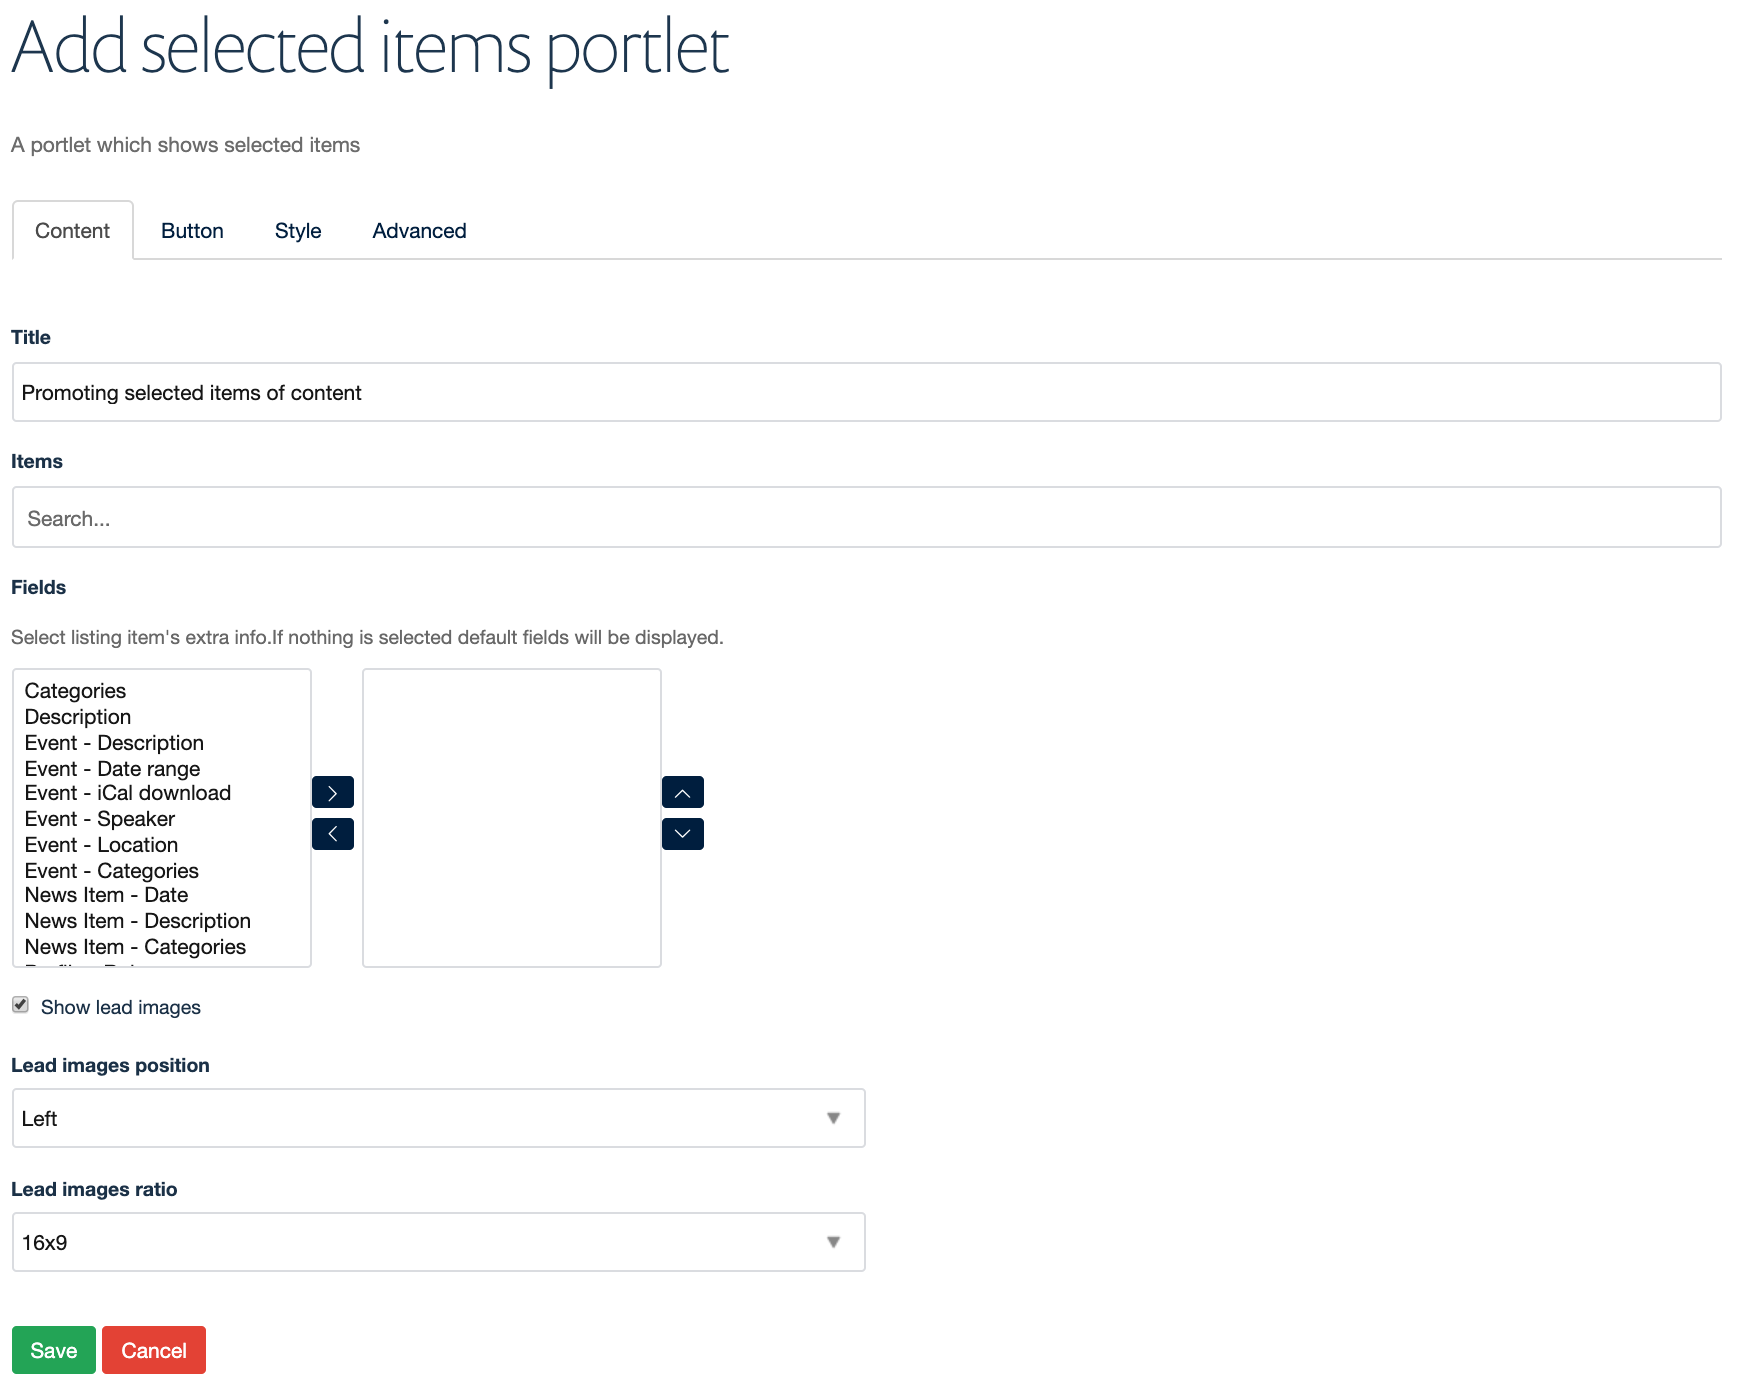
- 'Content' tab:
- Check the box if you would like to show the lead images for the items of content if they are available.
- 'Button' tab:
- '
- Please enter an internal or external link. The external link should be a fully formed URL including 'https'.
- 'Show more... link text'
- This is the text that will appear on the button. If you do not provide text, the default text will be shown 'Find out more'.
- 'Button alignment'
- This defines where on the portlet the button will be located
- 'Button type'
- This defines what kind of button you want to show.
- '
- 'Style' tab:
- 'Box Border'
- 'Box type'
- 'Advanced'
- 'Show only for sub-items'
- Check this box if you would like to add the portlet at a section level, and define that it shows only on all the items in the section, rather than on the section as well.
- 'Show only for sub-items'
- 'Content' tab:
- Once you have finished the configuration of the tile, do not forget to save the form at the bottom of the page.
Related articles