You will require this information when you would like to edit a research group.
Please note, this is new documentation fro the columns on the research group pages, as the way that the columns are managed was updated on 6th July 2016. As we have moved to a new way of managing the columns, when you are logged in, you will notice that you can see the column content twice. The reason for this is explained below.
Step-by-step guide for editing the columns on a research group.
Navigate to the research group that you would like to edit, and make sure that you are logged in, and have the appropriate level of access.
- When you are logged in, and looking at the columns on the research group, you will see the column content appearing twice. The content in the first arrangement of columns is the original content that was associated with the research group, before we implemented the new way to manage this. We have locked (made them no longer editable) the old columns, and displayed the contents of them to editors, so that you are able to see what information was in the columns previously, and be confident that the migration we have run converting the old columns into tiles, has been successful. We will leave the old columns in place for a month, before removing them systematically.
- The new way of managing the columns on research groups utilises the Cover Page functionality.
- To edit the content that is in the columns at the bottom of a research group, there are 2 steps:
- Editing the layout
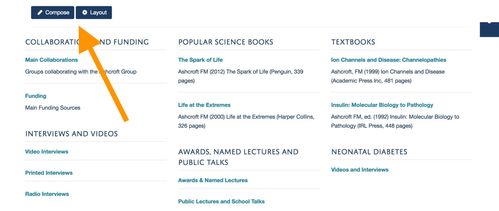
- To begin editing the layout, you can either click the 'Layout' button on the edit bar that appears at the top of the research group page, or you can use the shortcut button that is located just above the column content. You will find all of the information regarding editing the layout of the columns here.
- Editing the content in the columns
To begin editing and updating the content in the columns, you can either click the 'Compose' button that appears in the edit bar at the top of the research group page, or you can use the shortcut button that is located just above the column content. You will find all of the information regarding editing the layout of the columns here. You will find all of the information that you require to add content to the tiles in your layout here.

- Editing the layout
You have the ability here to use more than 3 columns in the research group page, but try to think like your users, lay the content out in an easy to read way, that makes your users engaged with the content. There is a video on how to use the new functionality here.
Adding sections and webpages to a Research Group page:
Navigate to the research group that you would like to add more pages to, and make sure that you are logged in, and have the appropriate level of access.
- Using the 'Add new' menu on the edit bar, select 'Section'. This is now creating a section that will be able to contain all of the pages that you wish to add to the research group as further information for your users.
- Once you have added the section, you will be taken to its blank landing page. Once in the section you will have the ability to add webpages, along with other appropriate content types.
Once you have created the content that you wish to, you can then link to it using a range of different tiles that are available to you in the cover page layout - the columns at the bottom of the research group page.
Please note, if you would like to add more content to the section, or edit the content that you have created, before publishing it, you can navigate to your research group page, select 'Contents' in the top left of the edit bar, you will now see all the sections and pages contained within the research group.
Related articles